
As posted by The Realm Of Venus:
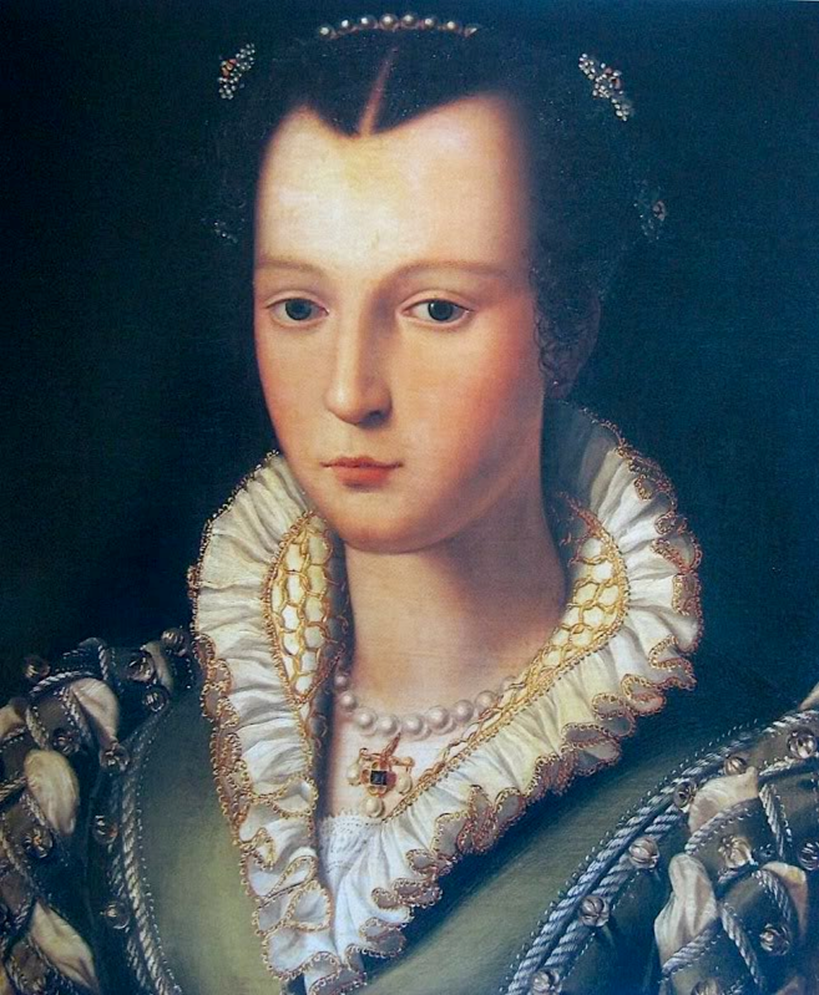
To celebrate the Realm of Venus' tenth anniversary on the wonderful world wide web I am issuing a challenge to dedicated historical costumers everywhere: to create a complete man's, woman's or child's late Italian Renaissance outfit of any social class and based on the period 1480 - 1610 from the skin out, including an accessory, in four months. That's only one layer or accessory per month - you can do it!
I started this competition wanting to make an outfit for myself and one for my husband. However, in the end I finished with just my gown. Sewing for myself has always presented difficulties. I have been a paraplegic for the past six years, after I was paralyzed in a car accident at 23. Because of this, details such as accurate measurements, the fit of skirts and the use of foundation garments can present problems. In addition to these concerns, the timing of this competition proved to be a challenge in itself. At the end of May I had a week of intensive physical therapy at a spinal cord injury clinic and at the beginning of June I had surgery, both of which altered my body and made previous measurements and pattern drafting obsolete. I had to wait until I was healed from surgery to begin construction on most of my gown.
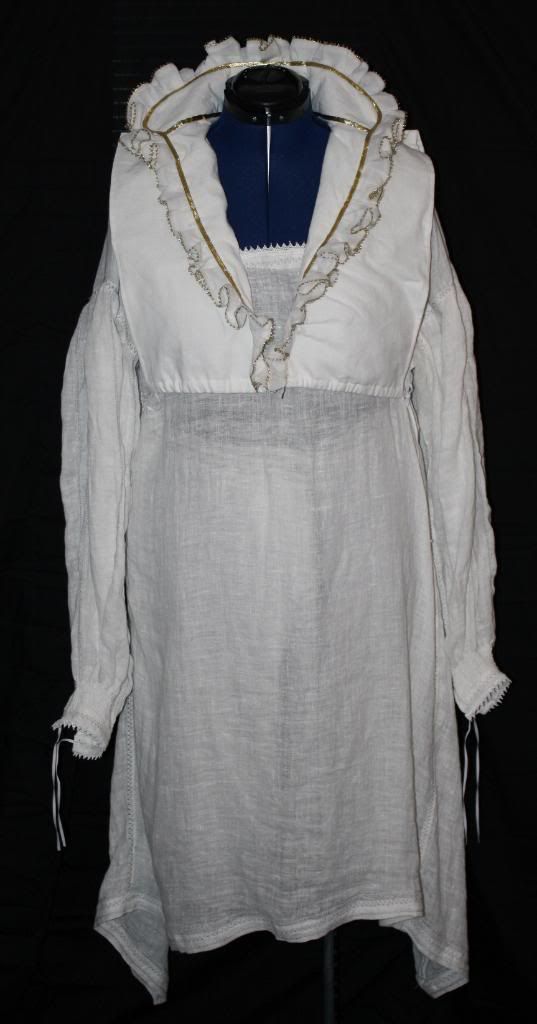 Layer 1: The first layer for the competition was my chemise. It was made out of very lightweight linen and decorated with machine embroidery at the hem, neck, cuffs, sleeves and seams. The neckline and cuffs are trimmed with small lace trim.
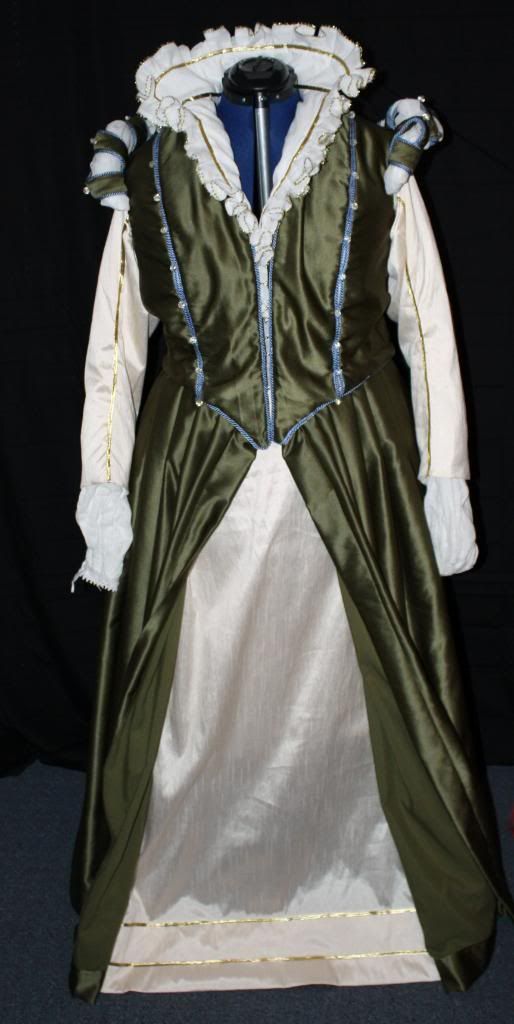 Layer 2: The second layer was my underskirt and sleeves. I had started thinking that I wanted the sleeves and skirt to be blue, but after two failed attempts with different blue fabrics I switched to a white linen/silk blend I had in my stash. The skirt and sleeves are trimmed with gold braid and the skirt has a deep hem for a little bit of stiffening. The skirt is not as full as a normal skirt would be, to prevent it from getting caught in my wheelchair tires. The sleeves are tacked into the doublet for ease of wear.
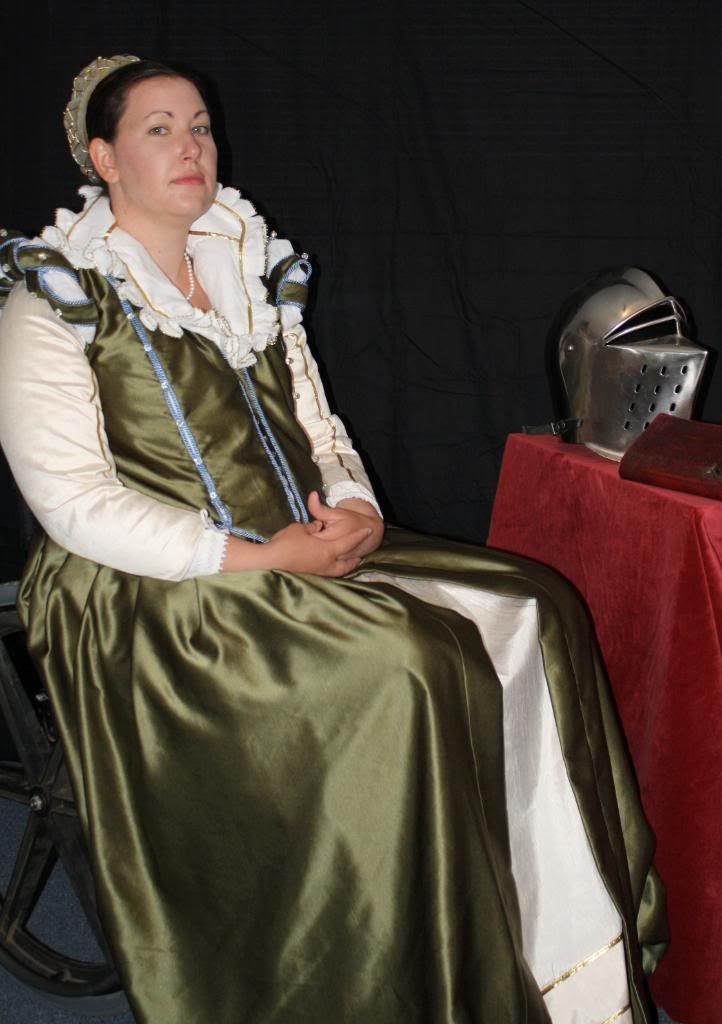
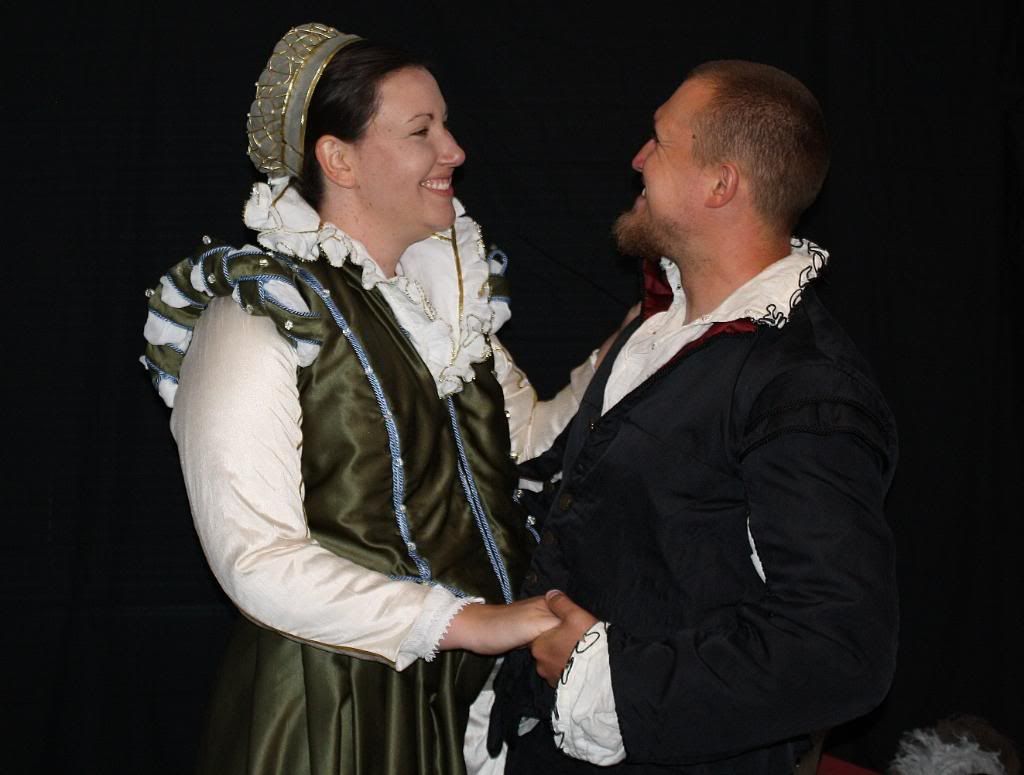
 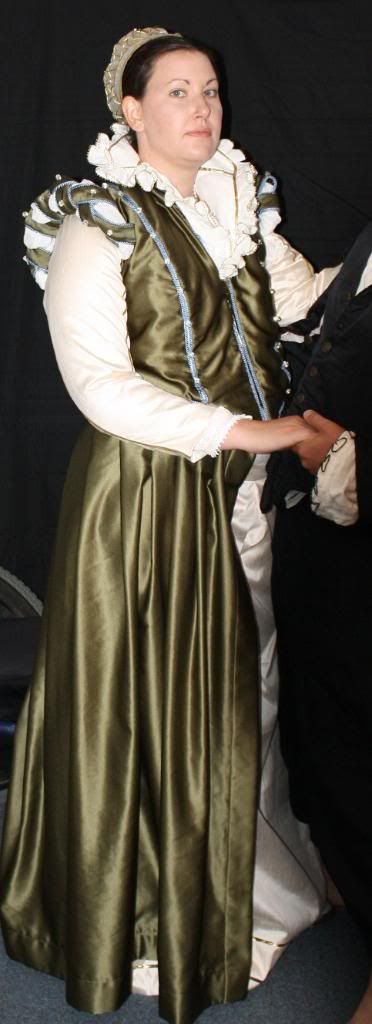 Layer 3: The doublet gown is made out of a sage green satin and trimmed in pale blue cording. Because of skin integrity and blood circulation issues, I can't wear corsets. The doublet is lightly boned to help give it structure and provide a little bit of support. The skirt is, again, not as full as would traditionally be expected. The doublet is flatlined in linen canvas and lined in cotton. The doublet closes up the front with hook and eyes. The beads on the gown were one of the hardest things to match to the portrait. I finally hunted down segmented clear glass beads and wrapped them in gold wire- there are 40 in all. The braided shoulders were one of the more difficult parts of the gown, but I am very pleased with the result.
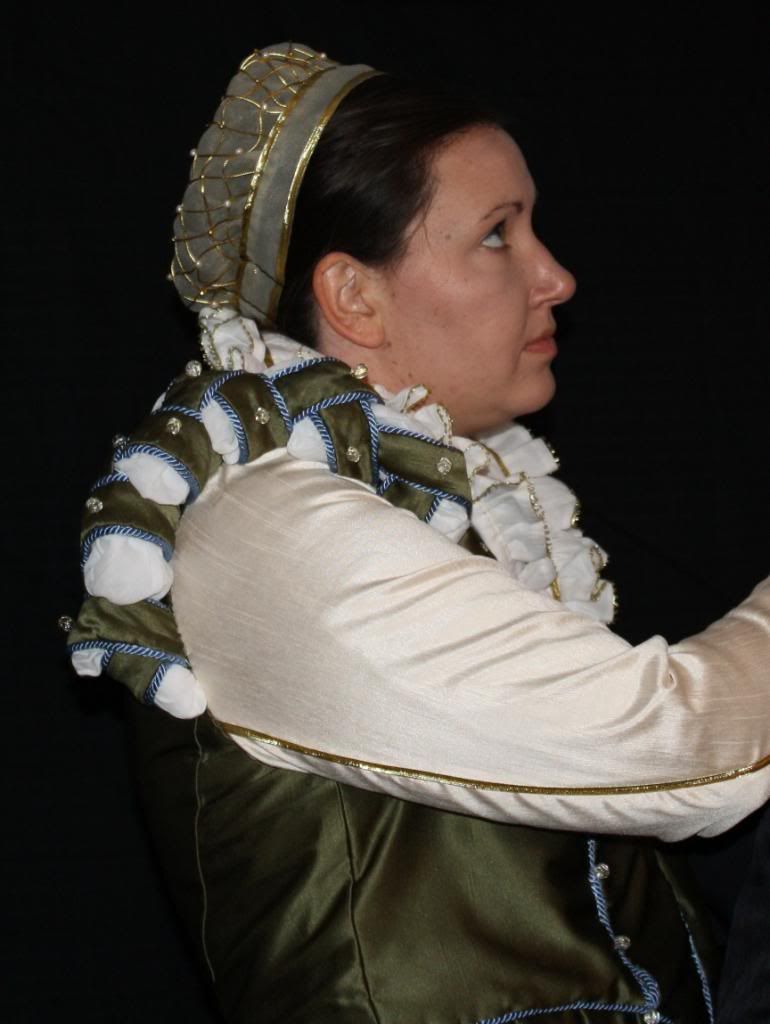
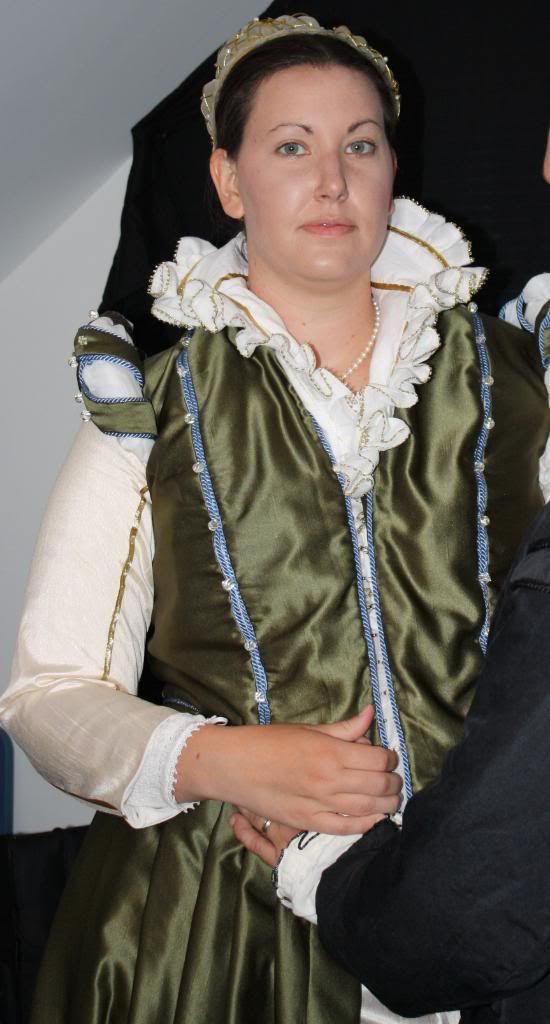
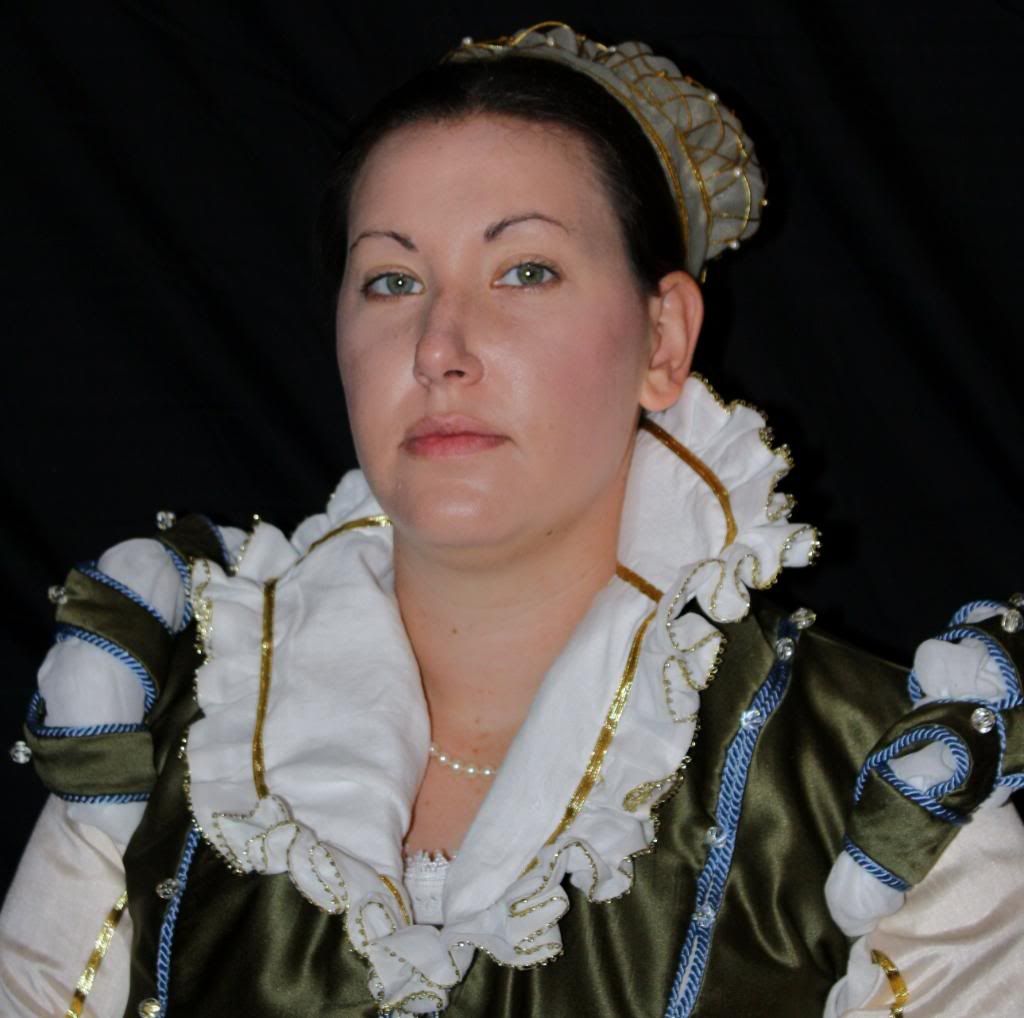
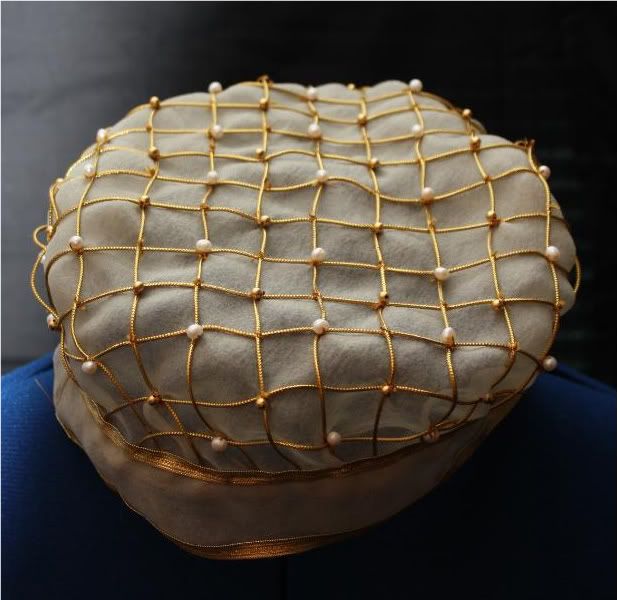 Layer 4: The caul is made out of pale sage chiffon and decorated with gold mesh. There are freshwater pearls and gold beads as well as gold braid for additional decoration.
 Additional pieces:
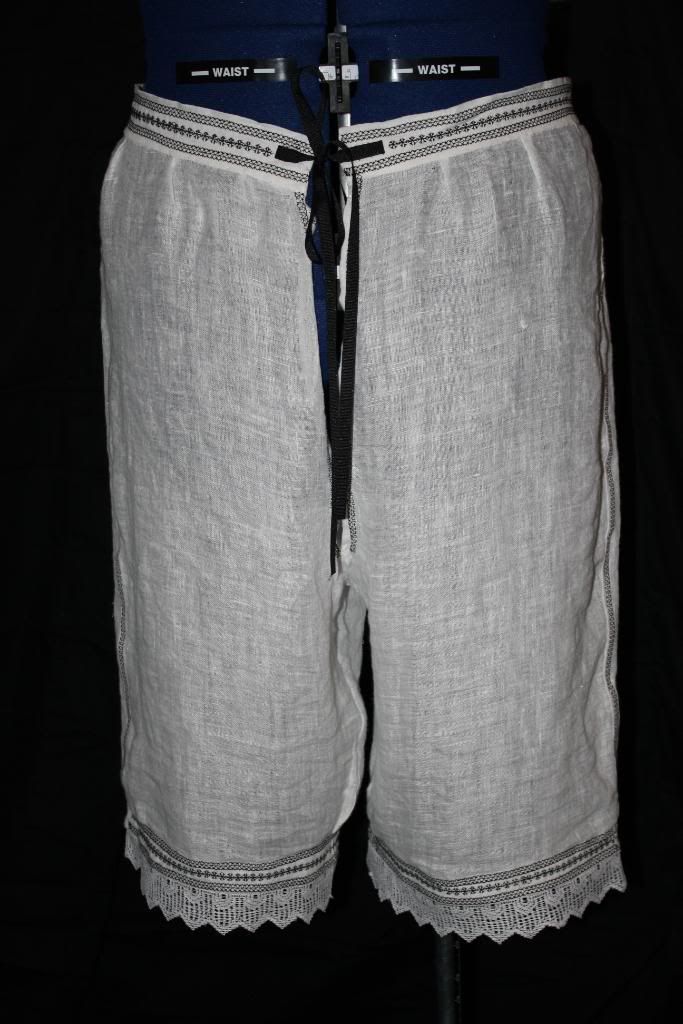
The drawers were made from the same lightweight linen as the chemise and decorated with blackwork embroidery. They tie at the waist and close in the front with hook and eyes. Lace decorates the bottom of the legs.
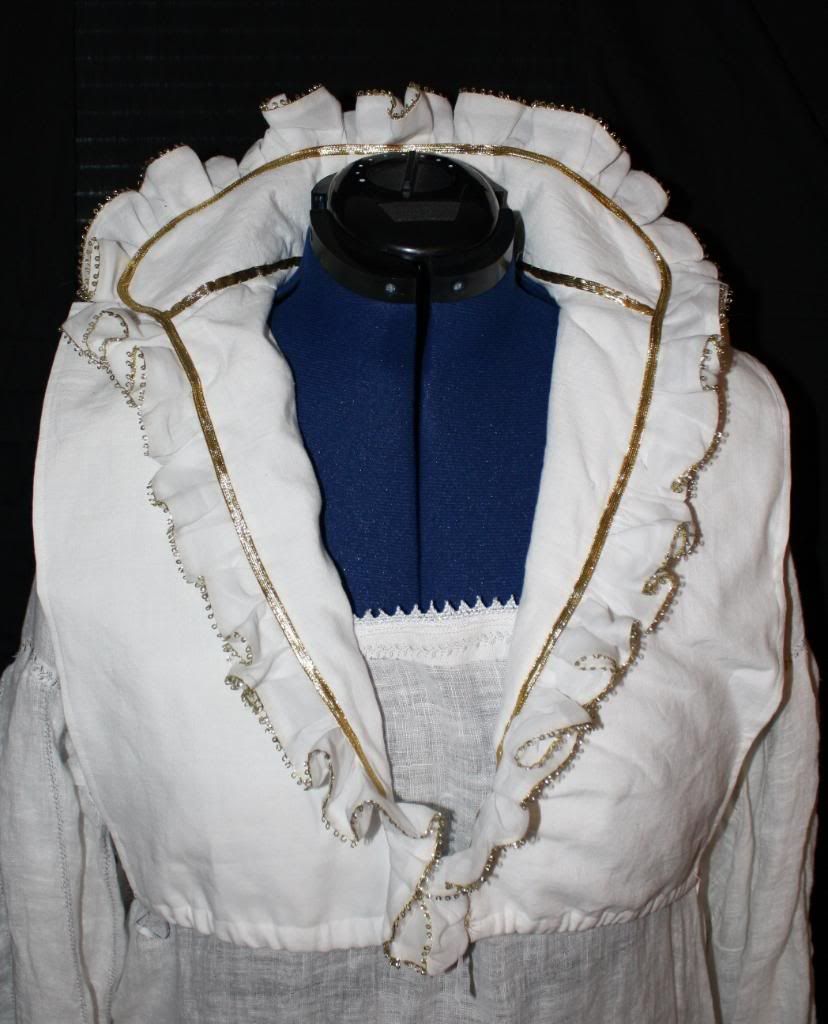
The partlet was made from linen and trimmed in gold braid. The ruffles are edged in very small gold lace. The partlet ties at the sides and front with white ribbons.
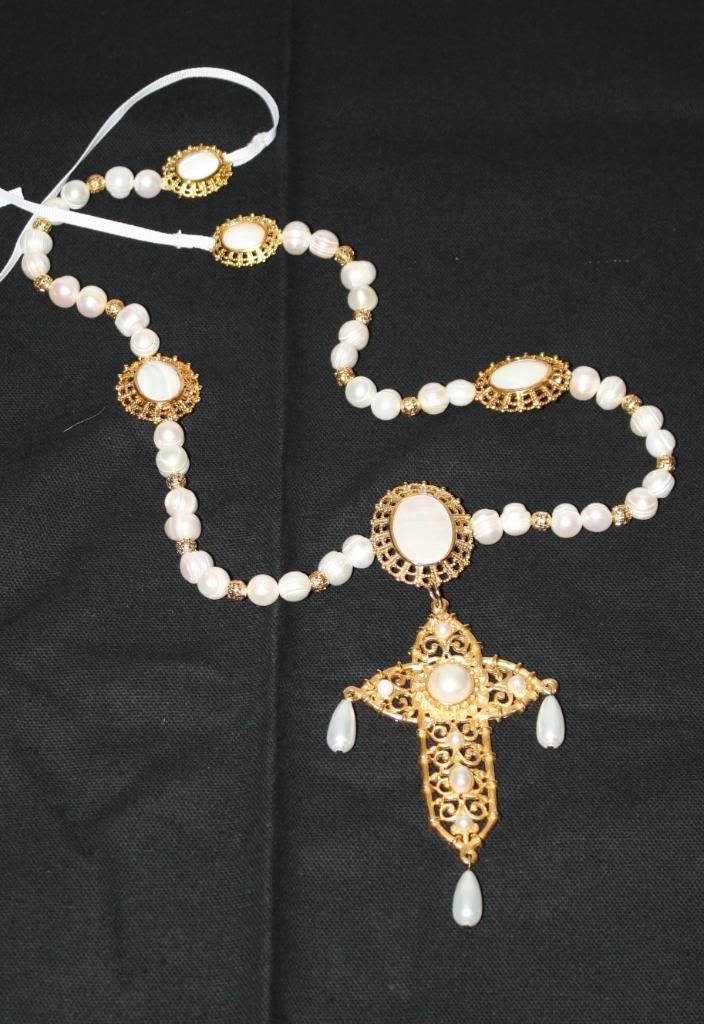
The girdle was made from "found" pieces. The pearls are freshwater and separated with gold filigree beads. The cross was found in an antique shop in Carlsbad, California. It was missing one of the pearls, which I replaced. The other settings were found in my stash during a massive cleaning spree and mother of pearl stones were added. It ties at the back with white ribbon.
There are very few things I would change about my project. I would like the fit of the doublet to be a little tighter, but since fitting myself while in the chair can be a little complex, I am just happy that it fits as well as it does. Standing pictures were taken with AFOs and a LOT of help.
There are a lot of people who deserve thanks for getting me through this particular project. There were many people who supplied hours of late night Facebook conversations during endless rounds of handsewing, especially my sister and Frank, who also should be applauded for his restraint in putting me to bed and not laughing (too much) after finding me face down and passed out in a pile of tools and pins. Morwin, who puts up with me every day and was always there to offer his own gentle suggestions about how to be less of a nutter.
And of course, my husband...
for putting up with all of this crazy and the stash and the mess, and the lack of decent conversation and shared meals for the insane last weeks of the competition.